Special Customer Number Issue
The Special Customer Number Issue transaction is used to enter a new customer number without providing a social security number or FEIN.
![]() Before beginning the Issue Special Customer Number transaction, do the following:
Before beginning the Issue Special Customer Number transaction, do the following:
i.Inquire by name and social security number to be sure a record has not already been established for your customer.
ii.Clear all information by clicking the Window>Close all Transaction Tabs on the top Menu Bar
To Issue a Special Customer Number
From the Main Window Go To ..... |
Steps to Follow ..... |
|---|---|
Alerts Grid |
No alert is displayed for this transaction. |
Transaction Menu |
1.Click the Transaction Menu button in the Main Menu Bar. 2.Navigate to Customer Transactions>Customer>Special Customer Number Issue(QAS IN)(SPECUSIN) and click it. The Issue Special Customer Number(QAS IN) transaction form opens. 3.Continue with the steps below. |
Command Line |
1. Enter SPECUSIN on the Direct command line, then press the Enter key. 2. The Issue Special Customer Number(QAS IN) transaction form opens. 3. Continue with the steps below. |
Quick Navigation |
After the customer has been set up, recall the transaction to activate the Quick Navigation button. Click the Quick Navigation •Driver License Issue •Emergency Contact •ID Card Issue |
1.In the Customer Number field, enter the alpha assigned to your CSC (T or A or B, etc.).
2.Enter the required information as indicated by the ![]() icon and any other information as applicable.
icon and any other information as applicable.
3.In the Full Legal Name field enter the individuals name using the following format:
LASTNAME,FIRSTNAME,MIDDLENAME
![]() If the customer does not have a middle name, you must put in the last comma after the first name like this:
If the customer does not have a middle name, you must put in the last comma after the first name like this:
LASTNAME,FIRSTNAME,
For a Business, enter the business name followed by double comas.
mySelect BUSINESS NAME,,
![]() For IFTA customers, click the "Yes" radio button to indicate if the customer is a non-purge customer or "No" if the IFTA customer may be purged.
For IFTA customers, click the "Yes" radio button to indicate if the customer is a non-purge customer or "No" if the IFTA customer may be purged.
Note: The radio buttons will be active for the IRP In-State work center only.
4.For help with primary and dwelling addresses, see USPS Address Verification.
5.In the Picture Information section, select Yes next to Send to Camera.
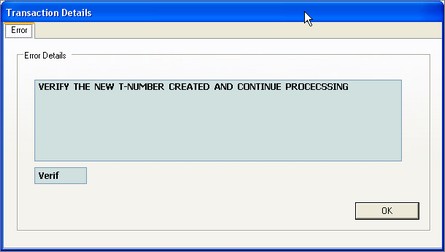
6.Click the Process ![]() button. The new customer number is issued. A message appears stating "VERIFY THE NEW T-NUMBER CREATED AND CONTINUE PROCESSING". Click OK to close the dialog.
button. The new customer number is issued. A message appears stating "VERIFY THE NEW T-NUMBER CREATED AND CONTINUE PROCESSING". Click OK to close the dialog.

7.Verify the customer number created in the Customer Number field before continuing.
8.Click the Process ![]() button. The Transaction Details dialog appears showing the transaction process message with the newly assigned customer number.
button. The Transaction Details dialog appears showing the transaction process message with the newly assigned customer number.
9.Click the Close ![]() button to close the Transaction Details dialog.
button to close the Transaction Details dialog.
10.Click the Close ![]() button to complete the transaction.
button to complete the transaction.
See Also
For more information, see the Driver's Licensing Guide DLG-0302 section

