Reports

Contents
Reports within DMV Select can be viewed or printed. If there is not a need for a paper copy of a specific report, the user can simply view it online. However, the option is always available to print any report.
To view or print a Report
1.From the button bar, click the Reports ![]() button. The Report Console appears and defaults to the current settlement date. The reports may be viewed by different dates or by a range of dates. The Report Console supports the following report types:
button. The Report Console appears and defaults to the current settlement date. The reports may be viewed by different dates or by a range of dates. The Report Console supports the following report types:
Click the Inventory Reports button to view the following reports:
•Document Activity
•Plate Activity
•Vital Record Activity
•Summary
•Status-Decal
•Status-Document
•Status-Plate/Permit/VIN
•Status-External Agency Inventory
•Receive/Transfer
•Decal Tally Sheet
•Decal Miscellaneous Cart Summary
Click the Transaction Reports button to view the following reports:
•Driver Transaction Report
•Vehicle Transaction Report
•Miscellaneous Transaction Report
•Motor Voter Report
•Transaction Activity - By Teller
•Return Check Invoice Payment
•Transaction Activity - By Deferred
•Customer Return Form Report
•Customer Return Form Statistics
•Transaction Activity - By Unit Number
•Transaction Activity - By Jurisdiction
•List Revenue Activity
•Debit/Credit Card Activity
•EZPass Payments/Violations Report
•Barcode Cover Sheet Transaction Report
Click the Exception Reports button to view the following reports:
•Fee Exception and Over/Short
•Overrides/Special Authorizations
•Void Transactions
•Stop Transactions
•ID DOC and RESIDENCY DOC Codes MD and RP
•Inventory and Title Documents
•Address Exception Codes
• KIES - Exception Reports
•Monthly CSC Exceptions - Summary Only
•Monthly CSC Exceptions - Sales Tax Only
•Monthly CSC Exceptions - All
Click the EVVE Reports button to view the following reports:
•EVVE Certifications by Customers
•EVVE Certifications by Teller
•EVVE Verification by Customers
•EVVE Verification by Teller
•EVVE Certifications and Verifications Totals Report
•EVVE Reconciliation Report
2.If you would like the report by a date range, click the Report by Date Range button, then enter Start Date and End Date.
3.To print the report, click the Print button from the button bar.
View/Print the Debit/Credit Card Activity report
From the button bar, click the Reports ![]() button. The Report Console appears and defaults to the current settlement date. Select a previous work date in the Work Date field.
button. The Report Console appears and defaults to the current settlement date. Select a previous work date in the Work Date field.
Click the Transaction Reports ![]() tab on the menu bar.
tab on the menu bar.
Scroll down to the Debit/Credit Cards Activity and click it.
The Debit/Credit Cards Activity grid opens with the Teller ID populated.
 |
| Click to view full size |
Using Filters:
•The open fields above the grid may be used to filter the transactions as needed. Enter the information in one or more of the filter fields (or clear all fields to see all of the debit/credit card transactions) and click the Inquire ![]() button.
button.
•The grid will display the transactions according to the filters selected.
•To clear all of the filters, click the Refresh Filters ![]() button.
button.
•To print the Debit/Credit Cards Activity report, Click the Preview ![]() button. Then click the Print
button. Then click the Print ![]() button.
button.
•Click the Close ![]() button to exit.
button to exit.
![]() The receipt for customers using more than 5 debit/credit cards will not list the individual debit/credit cards that were used, but instead print a message to SEE ATTACHED LIST. This list is to be generated from the Debit/Credit Cards Activity report for that log number. Use the Log Number filter to print the debit/credit card activity and attach it to the customer's receipt.
The receipt for customers using more than 5 debit/credit cards will not list the individual debit/credit cards that were used, but instead print a message to SEE ATTACHED LIST. This list is to be generated from the Debit/Credit Cards Activity report for that log number. Use the Log Number filter to print the debit/credit card activity and attach it to the customer's receipt.
Sending/Resending Reports to OnBase
![]() Some reports are sent to OnBase each night and others are sent after the settlement is successfully closed.
Some reports are sent to OnBase each night and others are sent after the settlement is successfully closed.
mySelect sends reports to OnBase in one of two ways. 1.Immediately after the successful completion of the SETTLEMENT CLOSE process, mySelect sends the following reports to OnBase: •Driver Transaction Report •Vehicle Transaction Report •Miscellaneous Transaction Report •Transaction Activity - By Teller •List Revenue Activity •Fee Exception and Over/Short •Overrides/Special Authorizations •Void Transactions •Address Exception Codes •Stop Transactions •ID DOC and RESIDENCY DOC Codes MD and RP Following the SETTLEMENT CLOSE message, you will also receive an informational message indicating the reports have been submitted to OnBase.
2.Each night after the OFFICE CLOSE is preformed, mySelect sends the following reports to OnBase: •Document Activity •Vital Records Activity •Inventory and Title Documents
Once all of the reports have been successfully sent to OnBase, an informational message displays (if you are still logged into mySelect) informing you that the reports have been transmitted to OnBase. Once submission has completed for ALL above reports, an email is sent to the CSC's location general email address containing details on the submission status for each report.
|
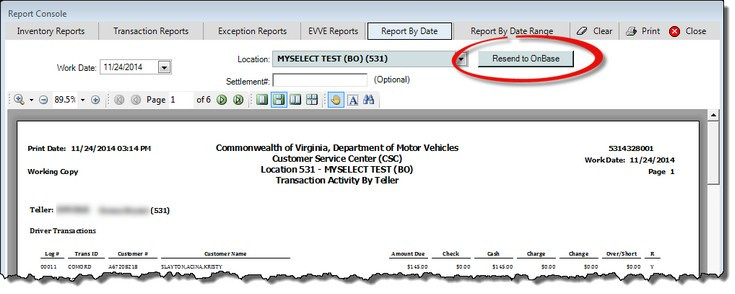
To facilitate the on-demand resubmission of one or more of the 14 different reports to OnBase, 1.Click the Reports 2.On the Report Console, Click the Inventory Reports button or the Transaction Reports button or the Exception Reports button to view the list of reports to open. 3.Select and click the desired report to open. 4.When the report opens, the Resend to OnBase
5.Click the Resend to OnBase
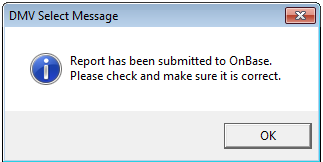
6.Click the OK button and verify the report is in OnBase. 7.Click the Close
If other reports need to be re-sent to OnBase, follow these steps for each report. |