Issue ID card

Contents
![]() Please refer to the Driver's License Guide, as needed.
Please refer to the Driver's License Guide, as needed.
![]() For a list of Legal Presence codes, click Here.
For a list of Legal Presence codes, click Here.
Common referenced topics:
•Adult Identification Card - Age 15 and Over DLG-0902
•Child Identification Card (Under Age 15) DLG-0901
To Issue an ID Card (Duplicate, Original Issue, Reissue or Renewal)
1.If not already open, Open the Customer Console using the customer's number or name.
2.Click the Send to Camera ![]() button on the Customer Console button bar.
button on the Customer Console button bar.
![]() Please refer to the Photographing Requirements section of the DLG, as needed.
Please refer to the Photographing Requirements section of the DLG, as needed.
3.Once the picture has been taken, continue with one of the below navigation's to start the ID Card Issue process.
From the Console Go To ..... |
Steps to Follow ..... |
||||||||
|---|---|---|---|---|---|---|---|---|---|
Alerts Grid |
Information about the customer's ID card may display as one or more of the following alerts:
|
||||||||
Quick Navigation From the Customer Console screen |
Click the Quick Navigation •ID Card Issue
|
||||||||
Quick Navigation |
From the Issue ID Card transaction screen Click the Quick Navigation •Compliance Update •Driver License / ID Card Surrender •Driver License History Inquiry •Driver License Issue •Driver Status Inquiry •Emergency Contact •Events Inquiry •Orders •SR22/FR44 Add •Veteran License/ID Release •Veteran Maintenance
|
4.The Issue ID Card inquire screen opens. Select the Transaction Type from the drop down ![]() box (Duplicate, Original Issue, Reissue, or Renewal).
box (Duplicate, Original Issue, Reissue, or Renewal).
If the new credential is to include Real ID, click the Yes radio button, otherwise, click the No radio button. Follow the instructions in DLG-0202 for scanning the documents presented.
5.Click the Inquire ![]() button to open the Issue ID Card transaction form.
button to open the Issue ID Card transaction form.
![]() Note: If the customer does not have a social security number in the DMV data base, the following message will display.
Note: If the customer does not have a social security number in the DMV data base, the following message will display.
The U.S. Citizen and Voter Registration radio buttons are active and once entered a paper application will print.
6.In the Identity Documents section, the U.S. Citizen and Voter Registration radio buttons are inactive and protected. When the License Exchange for an ID Card screen opens, the following message box appears.
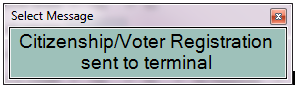
7.Instruct the customer to answer the questions. Once completed mySelect will send a message of completion.
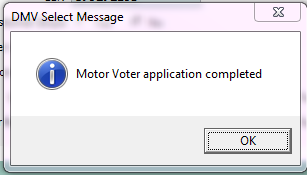
8.Click OK to continue.
9.The U.S.Citizen and Voter Registration radio buttons are now populated according to how the customer answered the questions on the credit card terminal.

10.Enter the required information as indicated by the ![]() icon and any other information necessary based on the Transaction Type selected.
icon and any other information necessary based on the Transaction Type selected.
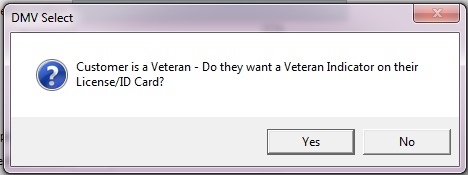
If the customer has the veteran discharge information on file and does not have the Veterans Indicator on their credential, the following pop up message will display. Answer accordingly to the customer's response.
If YES is clicked, the Veteran Status will indicate Verified and the Add Veteran Indicator? radio buttons will be open and YES marked. If the customer changes their mind, click the NO radio button.
If the customer's Veteran Status is Pending, the Pending radio button will be populated and protected as well as the Add Veteran Indicator? radio button.
To release the credential with or without the veteran documents, go to the Veteran ID Card Release transaction. |

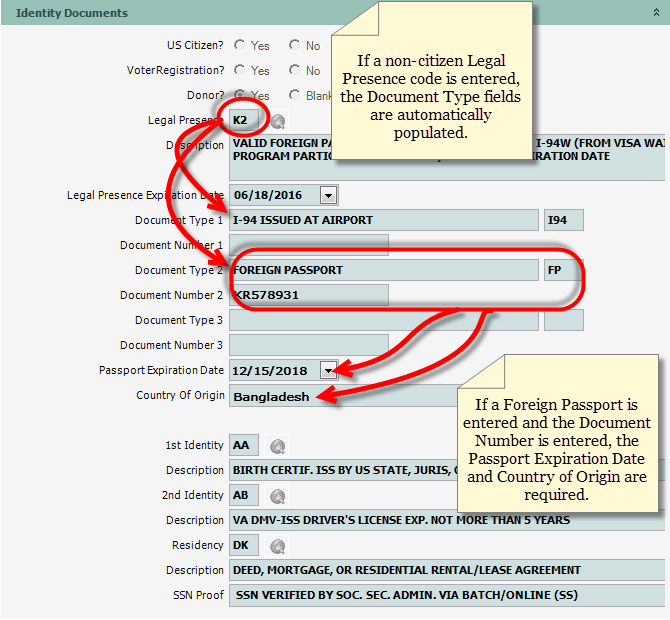
![]() Depending on the customer's proof of Legal Presence, verification may have to be done via the SAVE interface. Click here for a list of Legal Presence Codes.
Depending on the customer's proof of Legal Presence, verification may have to be done via the SAVE interface. Click here for a list of Legal Presence Codes.
![]() When Legal Presence is required and after entering a Legal Presence (LP) code, the Legal Presence Authorization window will pop up. Your manager or designee will review the Legal Presence information entered to verify what was entered.
When Legal Presence is required and after entering a Legal Presence (LP) code, the Legal Presence Authorization window will pop up. Your manager or designee will review the Legal Presence information entered to verify what was entered.
If the customer is using an unexpired passport as the Legal Presence code, mySelect will verify with U.S. Passport Verification Services (USPVS) before the credential is issued. See Passport Verification for more information.
After your manager or designee has reviewed the information, they will complete the authorization by entering their (COV) User Name and Password which will allow the transaction to continue. Self authorization will not be allowed.
Click the Accept button to complete the authorization and continue the transaction or click the Decline button to exit the authorization and go back to re-enter the information.
 |
| Click to view full size |
11.Click the Process ![]() button. The Select message box appears to confirm the new ID Card expiration date. Click the
button. The Select message box appears to confirm the new ID Card expiration date. Click the ![]() button to continue.
button to continue.
12.The Transaction Detail Payment dialog opens. Enter the payment according to the Processing_Payment procedures.
13.Click the Process ![]() button. The Document Imaging Barcode Cover Sheet is printed and the Receipt Details dialog appears. Print the receipt if requested.
button. The Document Imaging Barcode Cover Sheet is printed and the Receipt Details dialog appears. Print the receipt if requested.
14.Click the Close ![]() button to close the Receipt Details dialog. The Transaction Details dialog appears with the TRANSACTION PROCESSED message.
button to close the Receipt Details dialog. The Transaction Details dialog appears with the TRANSACTION PROCESSED message.
15.Click the Close ![]() button to close the Transaction Details dialog.
button to close the Transaction Details dialog.
16.Click the Close ![]() button to complete the transaction.
button to complete the transaction.
See Also
Customer - Change All Addresses
New restrictions added to the globe selection for designation of intellectual disability and autism spectrum disorder.
|

SB 1077 results in new functionality in mySelect, regarding legal presence documentation.
|