Configure paper trays

Contents
The Edit Printer functionality is used to configure paper trays on a Windows printer for use with mySelect.
To configure paper trays
| 1. | From the main menu bar, select Tools > Settings > Manage Printers. The Settings dialog appears with the Manage Printers tab active. |
| 2. | From the list of printers, click to the left of the printer you want to edit to select it. The Edit Printer and Remove Printer buttons are now active on the button bar. |

| 3. | From the button bar, click the Edit Printer |
| • | There are three Print Types: Standard, Title, and POD Tag, which represent the three types of paper used by DMV offices. |
| • | For each of these Print Types there is an associated Paper Source. The Paper Source is the paper tray where the paper is loaded. |
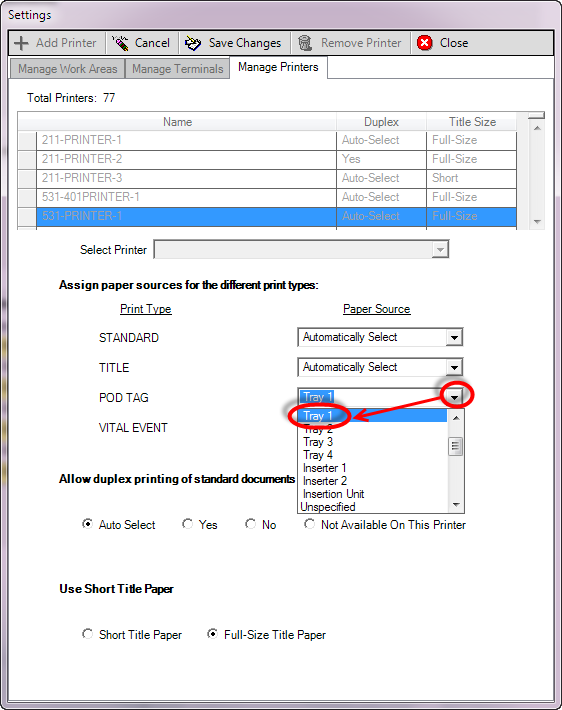
| 4. | For the Print Type, click the down arrow from the Paper Source drop-down and select the tray where the paper is loaded in your printer. |
| 5. | Repeat this process for each Print Type. |
| 6. | When done, click the Save Printer |
Typical settings (depending on the printer model) for a three-tray printer are shown below.
Print Type |
Paper Source |
Standard |
Tray 3 |
Title |
Tray 2 |
POD Tag (New as of November, 2013. 30-day multi-use synthetic paper) |
Tray 1 |
![]() Temporary functionality has been added in version 8.1 of mySelect to support full-size paper paper until the paper supplies have been exhausted.
Temporary functionality has been added in version 8.1 of mySelect to support full-size paper paper until the paper supplies have been exhausted.
The bottom half of the screen has a new section titled Use Short Title Paper. You must select which size title paper you have in your printer; either short title paper or full-size title paper.
 |
| Click to view full size |
See also